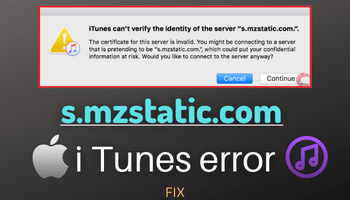
Many iTunes users are reporting an error when trying to exchange data with the server s.mzstatic.com. The error “iTunes can’t verify the identity of the server s.mzstatic.com” can happen due to various reasons, including incorrect device time and date, app data corruption, malware, or expired certificates. However, there’s no need to worry as there are various ways to fix this problem. In this article, we’ll guide you through 11 effective solutions to resolve “iTunes can’t verify the identity of the server s.mzstatic.com” issue.
1. Clear iTunes Cache and Data
Clearing the cache and data on your iOS device can be an excellent solution to fix this problem. To do so, enter your iOS settings, find the iTunes app, and click on “Clear History and Website Data.” Confirm by clicking on “Clear History and Data.”
2. Reinstall iTunes App
Another method to resolve this issue is to reinstall the iTunes app. If you’re using an iPhone/iPad, hold the app for a few seconds and click on “Remove App.” Search for iTunes in the App Store, click on “Install,” and fill in the details asked. If you’re using a MacBook, search for iTunes in the finder window, drag it to the trash icon, and empty the trash. Then, search for iTunes in the App Store, click on “Install,” and fill in the details asked.
3. Update iTunes Application
Make sure to use the updated version of iTunes as an outdated version can cause this issue. Go to the App Store, search for iTunes, and click on the update option (if available). Alternatively, open the App Store, flick on the profile icon, find iTunes, and click on update if available.
4. Reboot Your Device
You can reboot your iOS device to fix this issue by holding the side and one of the volume buttons simultaneously, pulling the slider to the right, and holding it until your iPhone turns off. After rebooting, hold the side button for a few seconds to turn the device on again.
5. Check Date and Time Settings
Make sure your device’s date and time are correct as it’s critical for every application to function correctly. Go to settings, click on general, then select the time and date feature. Turn on the “Set Automatically” option to update the time and date automatically.
6. Run iTunes in Safe Mode
Running iTunes in safe mode can help you detect where the problem lies. To run it in safe mode, press the Shift+control keys simultaneously, and double-click on the PC. A notification will appear, stating that iTunes is working in safe mode.
7. Change Certificate Trust Settings via Keychain
Changing the trust settings of any certificate can also resolve this issue. Close the iTunes app and Apple Store, locate Keychain on your device, and search for the certificate. Double-click on it and change the trust settings to “Always Trust.”
8. Disable VPN or Proxy Connections
Disable any VPN or proxy connections you’re using to access the internet. VPN or proxy connections often cause the “iTunes can’t verify the identity of the server s.mzstatic.com” issue.
9. Check Your Internet Connection
Ensure that your internet connection is stable and working correctly. Check your device’s network settings, and if there’s an issue, restart your router.
10. Turn Off Firewall or Antivirus
Firewalls or antiviruses installed on your device can cause this issue as they may block iTunes from accessing the server. Disable them temporarily and check if the issue is resolved.
11. Contact Apple Support
If none of the above solutions work, contact Apple Support for assistance.
In conclusion, these are the 11 effective solutions to fix “iTunes can’t verify the identity of the server s.mzstatic.com” issue. Ensure you follow the steps correctly to fix the problem and enjoy uninterrupted iTunes services.


